CloudFlare provides web performance and security solutions, enhancing site speed and protecting against threats.
Service URL: developers.cloudflare.com (opens in a new window)
cf_use_ob
The cf_use_ob cookie informs Cloudflare to fetch the requested resource from the Always Online cache on the designated port. Applicable values are: 0, 80, and 443. The cf_ob_info and cf_use_ob cookies are persistent cookies that expire after 30 seconds.
session
__cfwaitingroom
The __cfwaitingroom cookie is only used to track visitors that access a waiting room enabled host and path combination for a zone. Visitors using a browser that does not accept cookies cannot visit the host and path combination while the waiting room is active.
session
cf_chl_rc_i
These cookies are for internal use which allows Cloudflare to identify production issues on clients.
session
cf_chl_rc_ni
These cookies are for internal use which allows Cloudflare to identify production issues on clients.
session
cf_chl_rc_m
These cookies are for internal use which allows Cloudflare to identify production issues on clients.
session
__cfruid
Used by the content network, Cloudflare, to identify trusted web traffic.
session
__cf_bm
Cloudflare's bot products identify and mitigate automated traffic to protect your site from bad bots. Cloudflare places the __cf_bm cookie on End User devices that access Customer sites that are protected by Bot Management or Bot Fight Mode. The __cf_bm cookie is necessary for the proper functioning of these bot solutions.
session
__cflb
When enabling session affinity with Cloudflare Load Balancer, Cloudflare sets a __cflb cookie with a unique value on the first response to the requesting client. Cloudflare routes future requests to the same origin, optimizing network resource usage. In the event of a failover, Cloudflare sets a new __cflb cookie to direct future requests to the failover pool.
session
_cfuvid
The _cfuvid cookie is only set when a site uses this option in a Rate Limiting Rule, and is only used to allow the Cloudflare WAF to distinguish individual users who share the same IP address.
session
cf_clearance
Whether a CAPTCHA or Javascript challenge has been solved.
session
__cfseq
Sequence rules uses cookies to track the order of requests a user has made and the time between requests and makes them available via Cloudflare Rules. This allows you to write rules that match valid or invalid sequences. The specific cookies used to validate sequences are called sequence cookies.
session
cf_ob_info
The cf_ob_info cookie provides information on: The HTTP Status Code returned by the origin web server. The Ray ID of the original failed request. The data center serving the traffic
session

 Welcome to EnviroDIY, a community for do-it-yourself environmental science and monitoring. EnviroDIY is part of WikiWatershed, an initiative of Stroud Water Research Center designed to help people advance knowledge and stewardship of fresh water.
Our Github site is already active, you can see it here: https://github.com/StroudCenter
But I haven’t written up a tutorial for this sensor display project yet. If you’re good with code and the LCD hardware, take a look at the SDI-12 library examples and you should be able to replicate it pretty easily.
+1 from me for a “how to build for dummies”, would be really appreciated
Do you have some sketches or schematics available of the hardware? I wonder how you wired SDI to the Arduino.
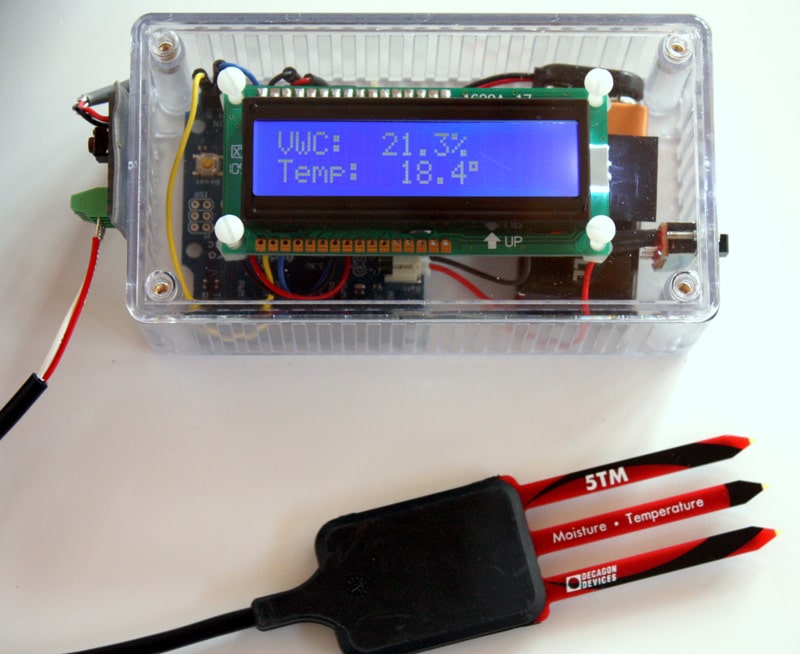
Wiring the sensor to the Arduino board is fairly simple, just connect the SDI12 sensor data line to a free data pin (like D7), connect the sensor power wire to Vcc, and sensor ground to GND. Then just use the sample code provided with the SDI12 library to poll the sensor for data and/or change the channel number. To use a pushbutton on the box for triggering a sample, just have the code sit in a loop looking for a button press, then when it sees the button press, enter the SDI12 sample function that’s shown in the example code.
If you want to avoid the SDI12 stuff altogether, for Decagon sensors you can just set the sensor to channel 0 and it will output a serial TTL string each time the sensor is powered up, so you can just use the momentary button press to power the sensor, capture that string and parse it.
Either method should work fine. I can provide example code for either if you’re interested.
Shannon, I would love a copy of your example code for both SDI12 and serial for the Decagon sensors. I’ve got several CTD-10’s that I”m including in a wireless sensor network and would like to use them with an Arduino Mega, but we haven’t worked with SDI12 yet. Thus the code would be greatly appreciated.
Thanks,
Stephanie
If you’re using CTD-10 sensors, you’ll need a way to connect their 3.5mm stereo plug to your Mega. Once you’ve done that, the code is pretty straightforward. I recently posted an example sketch (http://envirodiy.org/topic/arduino-datalogger/#post-1834) that polls 6 different Decagon 5TM soil moisture sensors that are all connected to the same SDI12 data pin. To use the code with CTD sensors instead of 5TM sensors, you can just change out the one 5TM sampling function for a CTD sampling function. Have a look at that example and see if that’s the kind of functionality you’re looking for, and if so I can post a version that’s specific to the CTD sensors. That example sketch doesn’t do any logging or saving the data, it just grabs the data from the sensors and prints it to the serial monitor every minute. If you want to timestamp your data and/or write it to a memory card and/or transmit it via a telemetry module, then something like the Mayfly would be a good option.
Dear Shannon,
is there a small tutorial (with parts, wiring and code) for this nice project? It would save me lots of efforts if I could just jump into this without going through all the initial research and trials. So far, I could not find it here and neither on GitHub.
Thank you so much.
Cheers. Conrad
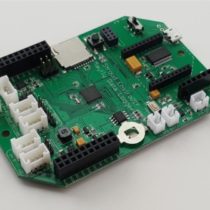
I originally built this in 2011 using an Arduino Pro board from Sparkfun and a standard 2×16 LCD with a LCD-SPI backpack interface from Adafruit. I used a clear enclosure because we wanted to be able to show people what’s inside, but the case isn’t waterproof so using it in the field isn’t a good idea. Now I make them using the Mayfly and a the waterproof enclosure that comes with the starter kit. I also use a different display that connects right to the Grove ports on the Mayfly, so the whole thing only requires: a Mayfly, battery, enclosure, display, 3.5mm stereo jack, and a momentary pushbutton. The code for interacting with a SDI-12 sensor can be found on our Github repo: https://github.com/EnviroDIY/Arduino-SDI-12
Any idea when your Github site will be up and running?
Shannon, I am currently testing the SDI-12 code to connect a Decagon CTD-10 to an Mbili board. According to their specs, they use the same processor (ATmega1284p) and clock speed (8 MHz) as the Mayfly. Using only a “carriage return”, when I hit “send” I get the following back in the serial monitor:
0M!
00013
0D0!
00+192+23.5+136
However, when I hit “send” a second time, I get the following:
0M!
00+192+23.5+13600013
0D0!
00+209+23.4+135
As you know, the “00013” at the end of the second line should be return on a line of its own, without all the data (i.e., 00+192+23.5+136) in front of it. Note that the returned data is the same as the previous measurement (00+192+23.5+136). I’ve tried all the different configurations of “new line, carriage return”, “new line”, “carriage return” with the serial monitor, and both “carriage return” AND “new line” returns the data listed above on the second time I hit send and any subsequent sends. Only the first send returns the correct data. It’s like the serial buffer isn’t flushing from the last 0DO! (“request data from address 0”) sent.
Looking at the code, it does appear that the mySDI12.flush is included after both the “take measurement” request (0MO!) and 0DO! (data request) so I’m not sure what is going on. As I mentioned, the clock speed and microprocessors are the same between the Mayfly and Mbili. I did manage to get the code to work correctly on an Arduino Uno.
Do I need to increase the “delay” time or something? Can you please advise?
Thanks!
Stephanie
Try changing your CTD address to “1” or anything other than 0. The sensors sometimes give slightly different outputs when they are configured as channel “0”. If that doesn’t fix it, I can send post some sample code that I use for interacting with the CTD sensors. However, we are currently in the process of rewriting most of our libraries in order to implement a new modular sensor method, so some of my previous examples might be broken now unless you use the older libraries.
Dear Shannon,
I am going to build this using Raspberry Pi, MPS-2 (SDI12 sensor) but without using any SDI12 adapter. I could not find any code for programming and how to establish the connection anywhere. Will you please help me to do this?
Thank you so much.